Basic Profile
The basic information of the business.
Logo
The logo must be on the computer used to program.
- Click on the
Editin the upper right of the Business Logo Box. - Click on the square containing the words “Choose an image.”
- Browse the computer for the logo.
- Click on the logo then choose Open.
Basic Profile
To update your business information, follow these steps:
- Click on the
Editbutton in the Basic Profile area. - Choose the price range that best represents your business.
- Enter your business website. Make sure it follows the https:// format and is a valid website.
- Select the appropriate
place typefor your business. If it's a Food and Drink establishment, you can specify the categories. - Provide a description of your business. This is what you want customers to know about your establishment.
- Once you've completed these steps, click
Saveto save your changes.
These steps will ensure that your business information is accurate and up-to-date, helping customers find and learn more about your establishment easily.
Tax Rates
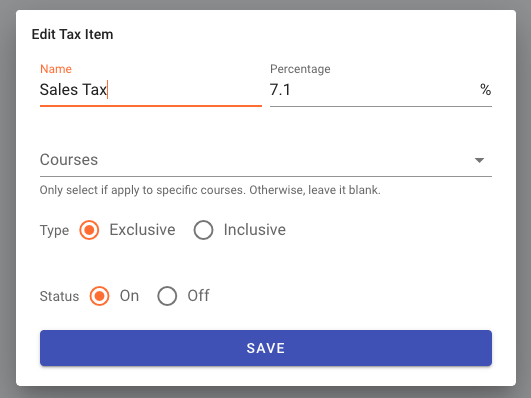
Selflane allows you to define one or more tax rates and apply them to the orders. To create or edit your tax rate, click on in the upper right of the Tax Rate box.
Name Tax name. Can be "Sales Tax", or specific name like "County Tax", "Acohol Tax"
Percentage Tax amount, between 0 and 100
Courses Optional. Only select if this tax is applied to specific courses.
Type Exclusive means add tax to items, inclusive means the percentage of tax is included in the price.
Status You can turn off a tax rate if it is temporary.
- Type in the name of the tax. For example: Sales Tax", or specific name like County Tax or Alcohol Tax.
- Enter the tax amount between 0 and 100.
- Courses [Optional]. Only select if apply to specific courses. Otherwise, leave it blank.
- Type of tax
- Exclusive means add tax to items,
- inclusive means the percentage of tax is included in the menu price.
- Status - You can turn off the tax rate if it is temporary. If a course has specific tax rates attached, other general taxes won't be applied to it.
- Review the information, if correct, click on
Save.
If a course has specific tax rates attached, other general taxes won't be applied to it.
Inclusive vs. exclusive tax
Tax rates can either be exclusive or inclusive. An exclusive tax is not included in the invoice subtotal, whereas an inclusive tax is.
The following table illustrates a 25% tax rate modifying the total amount due, depending on whether it’s exclusive or inclusive.
| TAX | Type | SUBTOTAL | TAX DUE | TOTAL |
|---|---|---|---|---|
| 25% | Exclusive | $5.00 | $1.25 | $6.25 ($5.00 + $1.25) |
| 25% | Inclusive | $5.00 | $1.00 (already included in the total) | $5.00 ($4.00 + $1.00) |
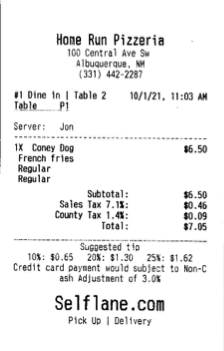
Receipt with Itemized Taxes
Please sort the taxes in your own order and they will be itemized in the printed receipt.
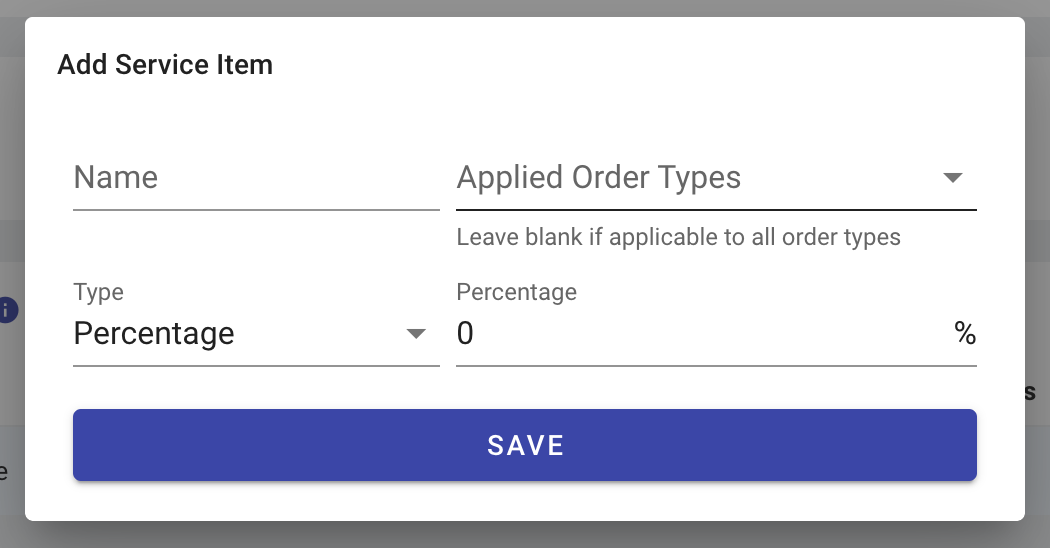
Service Items
A Service Item is a product or service that is automatically attached to all qualified orders. It can be configured as either a percentage or a fixed amount charge.
For instance, if you require a pre-tax percentage fee to be applied to all orders, you can create a service item with a percentage value.
Alternatively, if you need to add a fixed amount charge, such as a utensil fee for all to-go orders, you can create a service item with a specific fixed amount.
Please note that this feature requires POS App version 6.15 or later.
Email Address
This is the email address the online orders and reviews will be sent to.
- Click the
Editin the Email area, to edit the email addresses and recipients. - Once completed Click
Save
You can set up a primary email address and multiple cc' recipients.
Business emails are used primarily in receiving information for online orders, reservations, etc. For example, when an online order is placed, an email would be sent to the primary email address and all the copied recipients.
There is no cost to using the email service or adding more copied recipients.
We also send important announcements to online ordering systems to all primary email addresses disregarding their notification setup.
Turn off notification
For a business using our POS system and receiving many online orders a day, it may receive overwhelmed emails a day. If this applies to you, you can turn off the email notification.
However, please always update the business hours promptly for holidays and special occasions. You don't want to keep the system on and let customers order online when no one is working at the restaurant.

Phone Number
The business’s phone number customers would call, as well the phone number called if auto call for online orders ($0.10 per Call).
- Click the
Editin the Phone number area, to edit the business’s Phone number. - Once completed Click
Save
Address
The location of your business and time zone
- Click the
Editin the address area, Edit the Address of your Business. - Once completed Click
Save
Online Ordering
To configure the types of online offers your business wants to provide, follow these steps:
- Click on the
Editbutton in the online ordering box. - Check each box corresponding to the offers you want to make available, and specify the wait times for each offer.
- If your business exclusively serves members, enable the Limited Access option. Additionally, add the title for the Access ID and a note explaining the requirement of a valid ID.
- Once you've completed these steps, click
Saveto save your changes.
By following these steps, you can customize the online offers available to your customers and implement any necessary restrictions or requirements for your business.
Catering
Settings for the option to offer Catering. Any order with subtotal (before tip and tax) above the effective purchase value would be automatically categorized as a catering order. This would prevent any big order coming in without enough time to work on them.
- Click the
Editin the Catering Box. - Turn this offer on/off by checking or unchecking the Status box.
- Enter in your preferred information.
- Minimum Purchase
- Effective Purchase
- Lead Time, Choose day or hours with the drop down.
- The cut off hour.
- The Ahead up to days using the drop down.
- Once completed Click
Save
Business Licenses
Used to upload your business License.
- Click on
Upload - Choose the license type using the dropdown.
- Click on Upload file (the PDF of the License must be on the computer you are using), a window will open to search for the document. Once found click on .
- When completed click on
Submit
Create a Test Order
Click the Create a Test Order button to create a testing online order. It will help to see if the App's notification and printing are working as you expected.