Manage your menu
Set up your menu so staff can find dishes in the POS and customers can order them online. Open Menu > Menus in the Back Office . You can import an existing menu or add menus, courses, and dishes yourself.
Choose how to update your menu
Use the Menu Assistant card when you have a menu file or want to describe a change:
Import filereads a PDF, menu photo, CSV, or spreadsheet. Check the draft and choose which dishes to apply.Editpreviews a change you describe, such as “Add lemonade to Beverages for $3.50.”Proofreadsuggests fixes to dish names and descriptions. Accept only the changes you want.
Nothing changes until you choose what to apply. See Build your menu for the steps and file limits.
Selflane saves a copy before applying changes from these tools. An owner can restore it within seven days from Owner's Portal > Data & History > Backups in the Back Office . Restoring replaces your current menu.
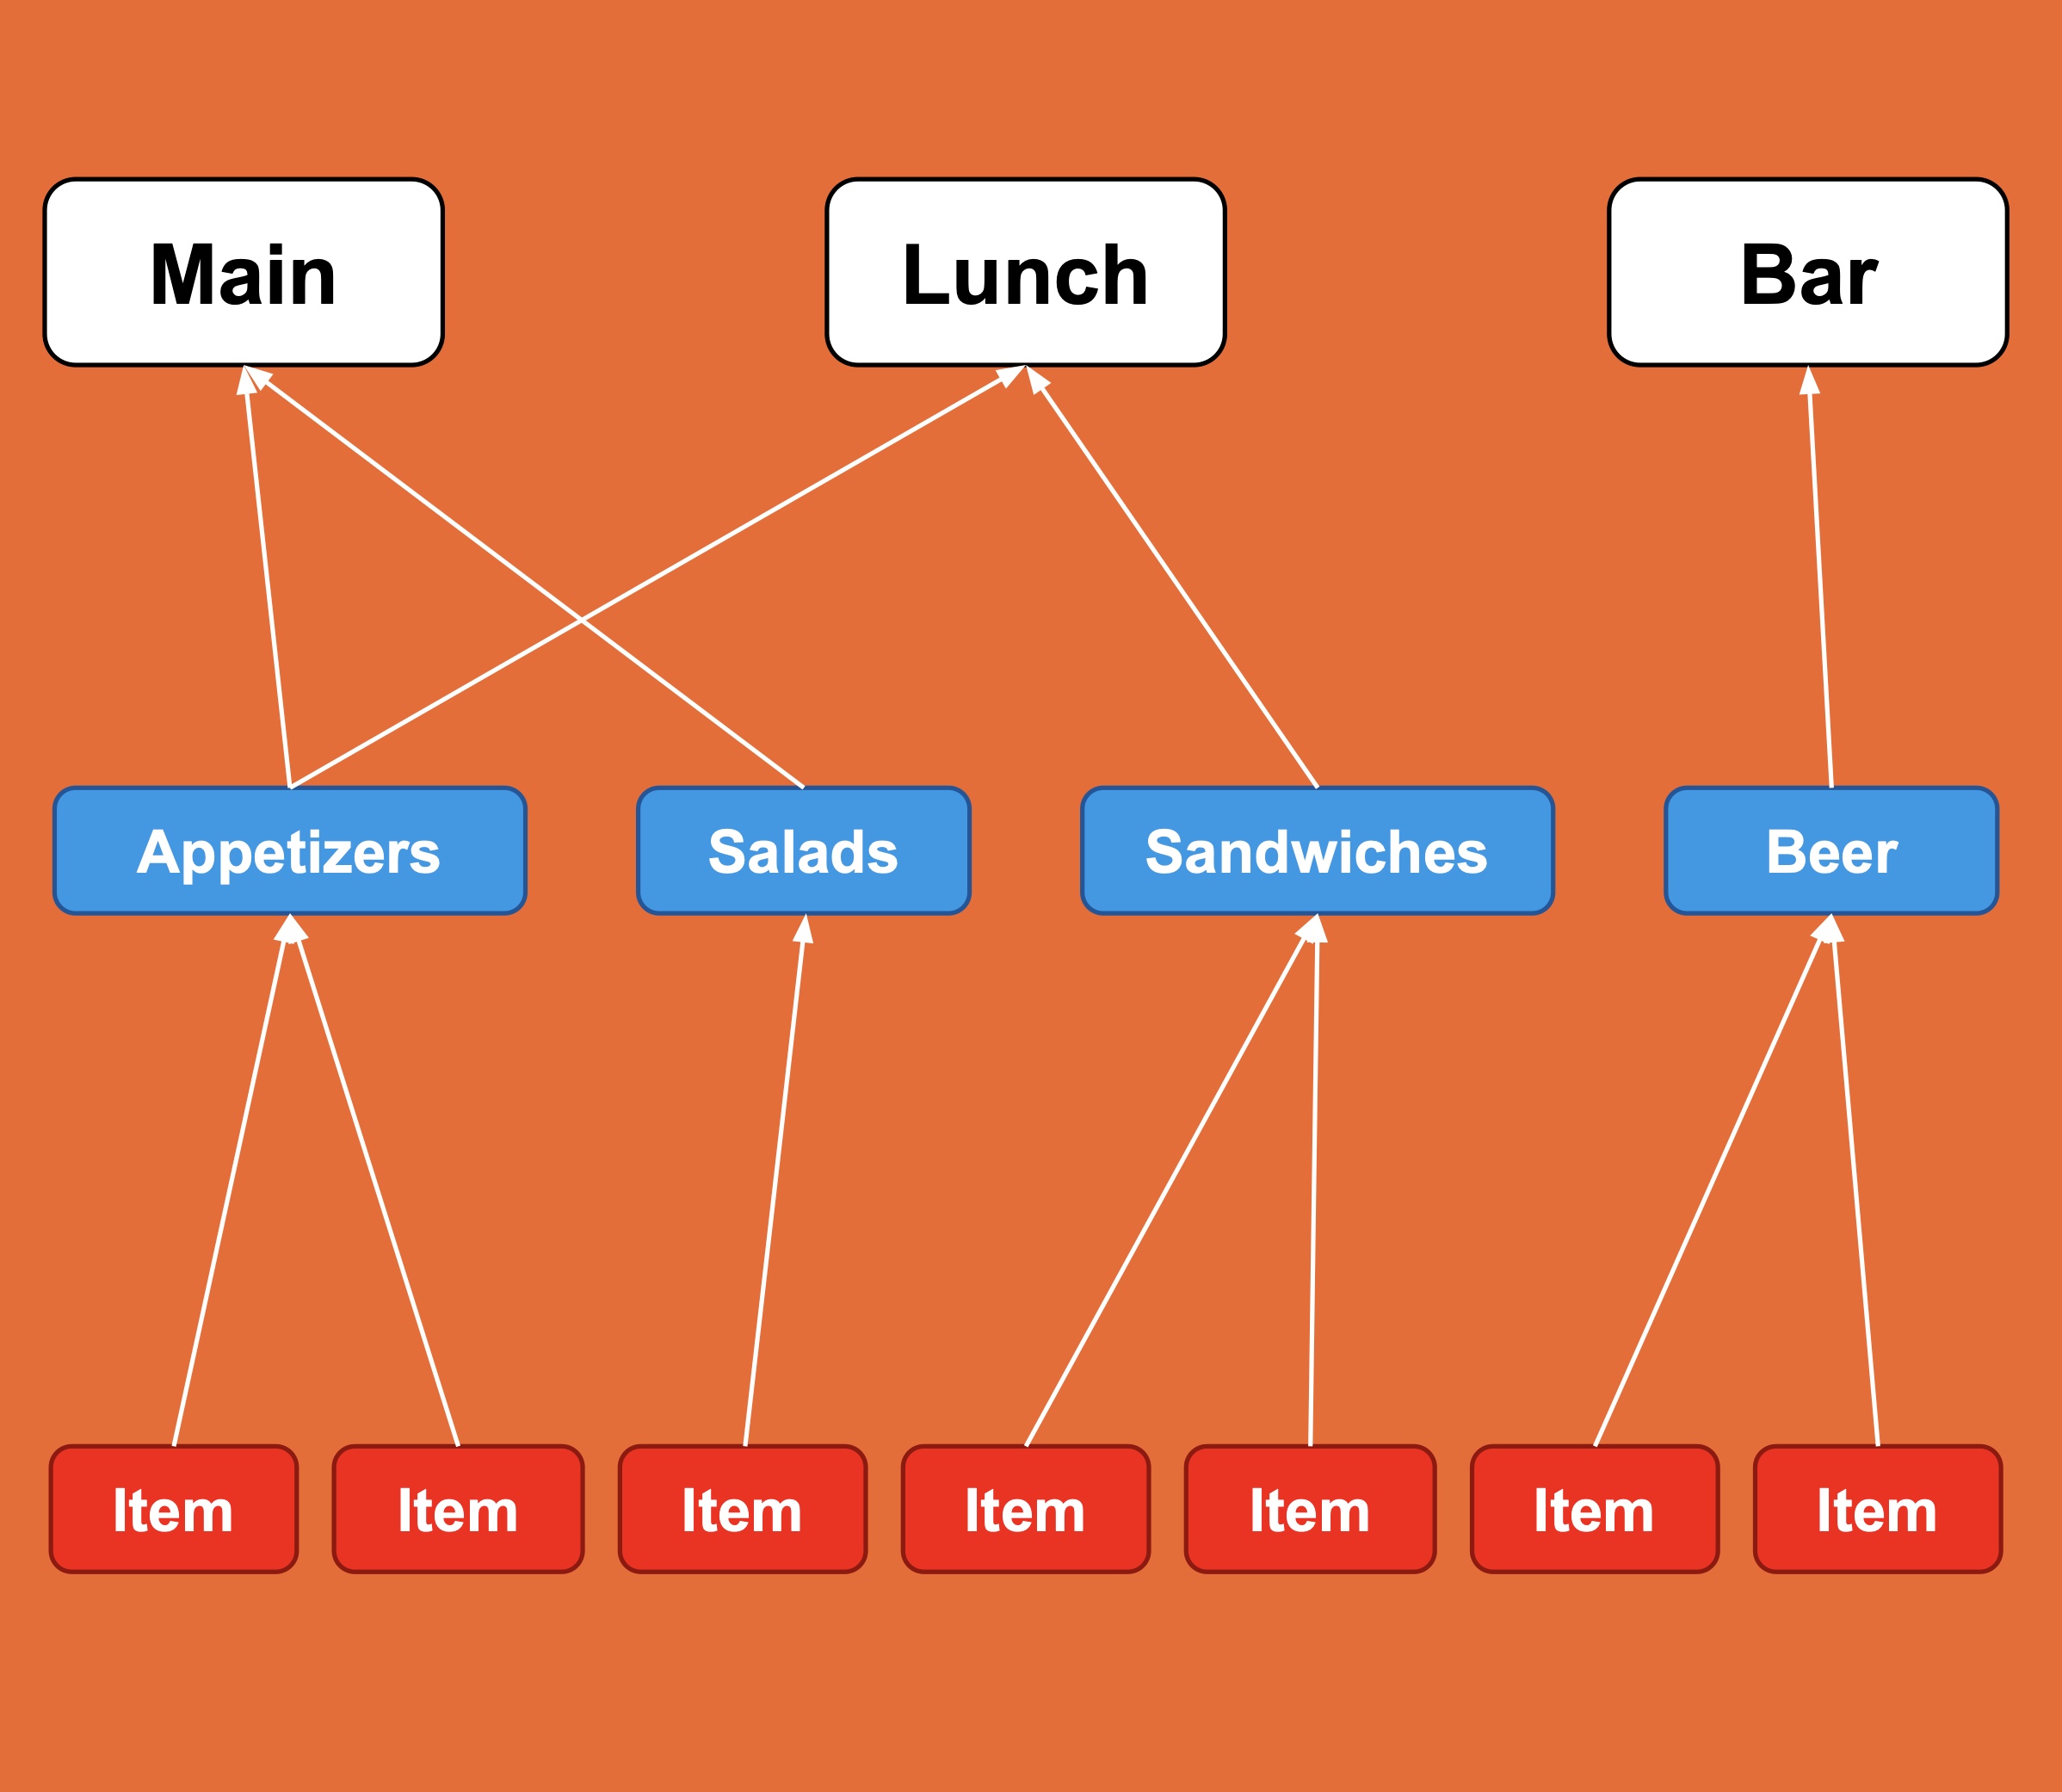
Understand the menu structure
| Part | What it does | Example |
|---|---|---|
| Menu | A collection of dishes you offer. | Lunch |
| Course | A section that helps people find dishes. | Appetizers |
| Dish | Something a customer can order. | Spring rolls |
For example, Spring rolls can appear under Appetizers on your Lunch menu. The same dish can appear on your Dinner menu too. Each dish has one course, so create your menus and courses before adding dishes.
Set up a menu
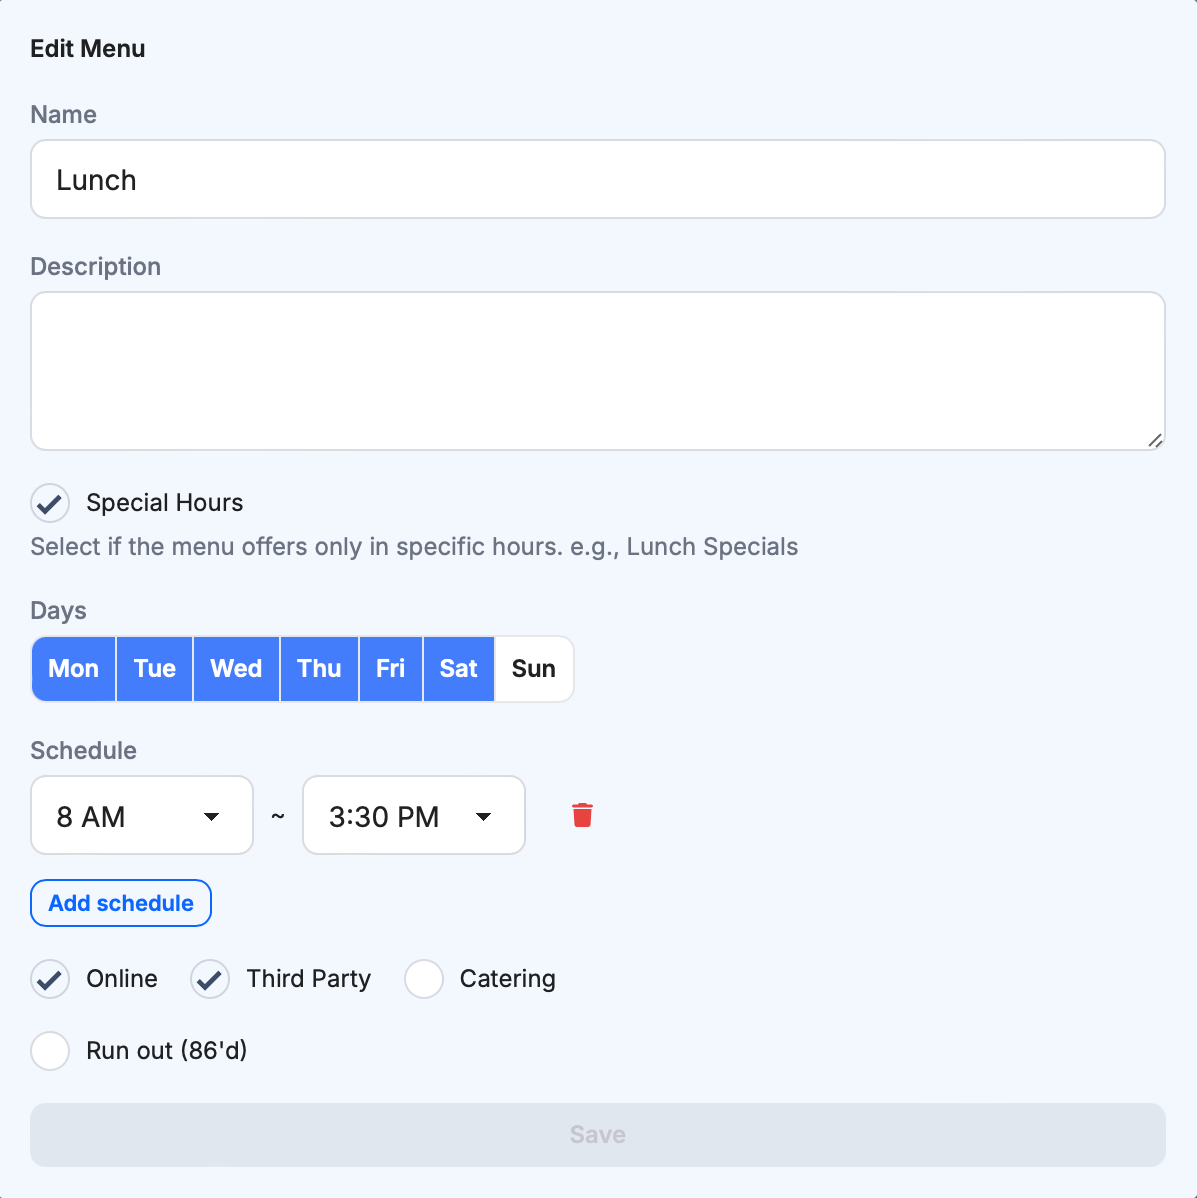
Make a menu for a group of dishes you sell together, such as Lunch, Dinner, or Happy Hour.
- Scroll to
Menus. Click+to add a menu, or click a menu card to change it. - Enter a
Namecustomers will recognize, such as “Lunch.” Add aDescriptionif needed. - If you serve it only at certain times, turn on
Special Hours. Choose the days and hours. Leave this off for an all-day menu. - Choose where the menu should be available:
- Turn on
Onlineif customers can order it from your Selflane site. - Turn on
Third Partyif you publish it through Third-Party Ordering. - Turn on
Cateringif it belongs in your online catering menu. Catering menus do not appear in the regular online menu. - Turn on
Run out (86'd)only when you need to make the menu temporarily unavailable.
- Turn on
- Click
Save.
To change the menu order, drag the cards in the Menus section.
Set up a course
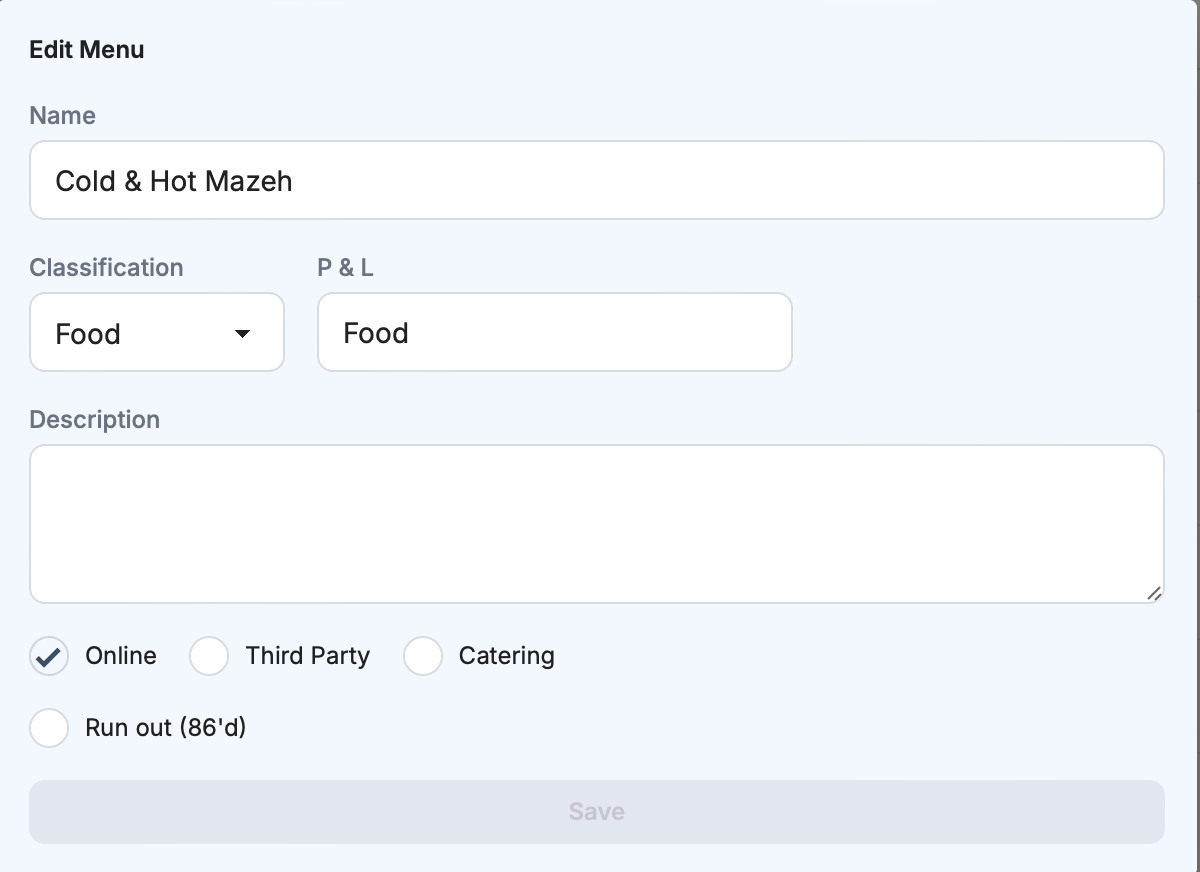
Courses are sections such as Appetizers, Entrees, and Desserts. They help staff and customers find dishes.
- Scroll to
Courses. Click+to add a course, or click a course card to change it. - Enter the
Name, such as “Appetizers.” Choose aClassificationthat fits the dishes, such as Food or Beverage. - Set
P & Lif you group sales for reporting. Otherwise, keep the default. - Turn on
OnlineorThird Partywhere you want the course to appear. UseRun out (86'd)to make the whole course temporarily unavailable. - Click
Save.
Use + Many to add several courses at once. Drag course cards to change their order.
Add a dish
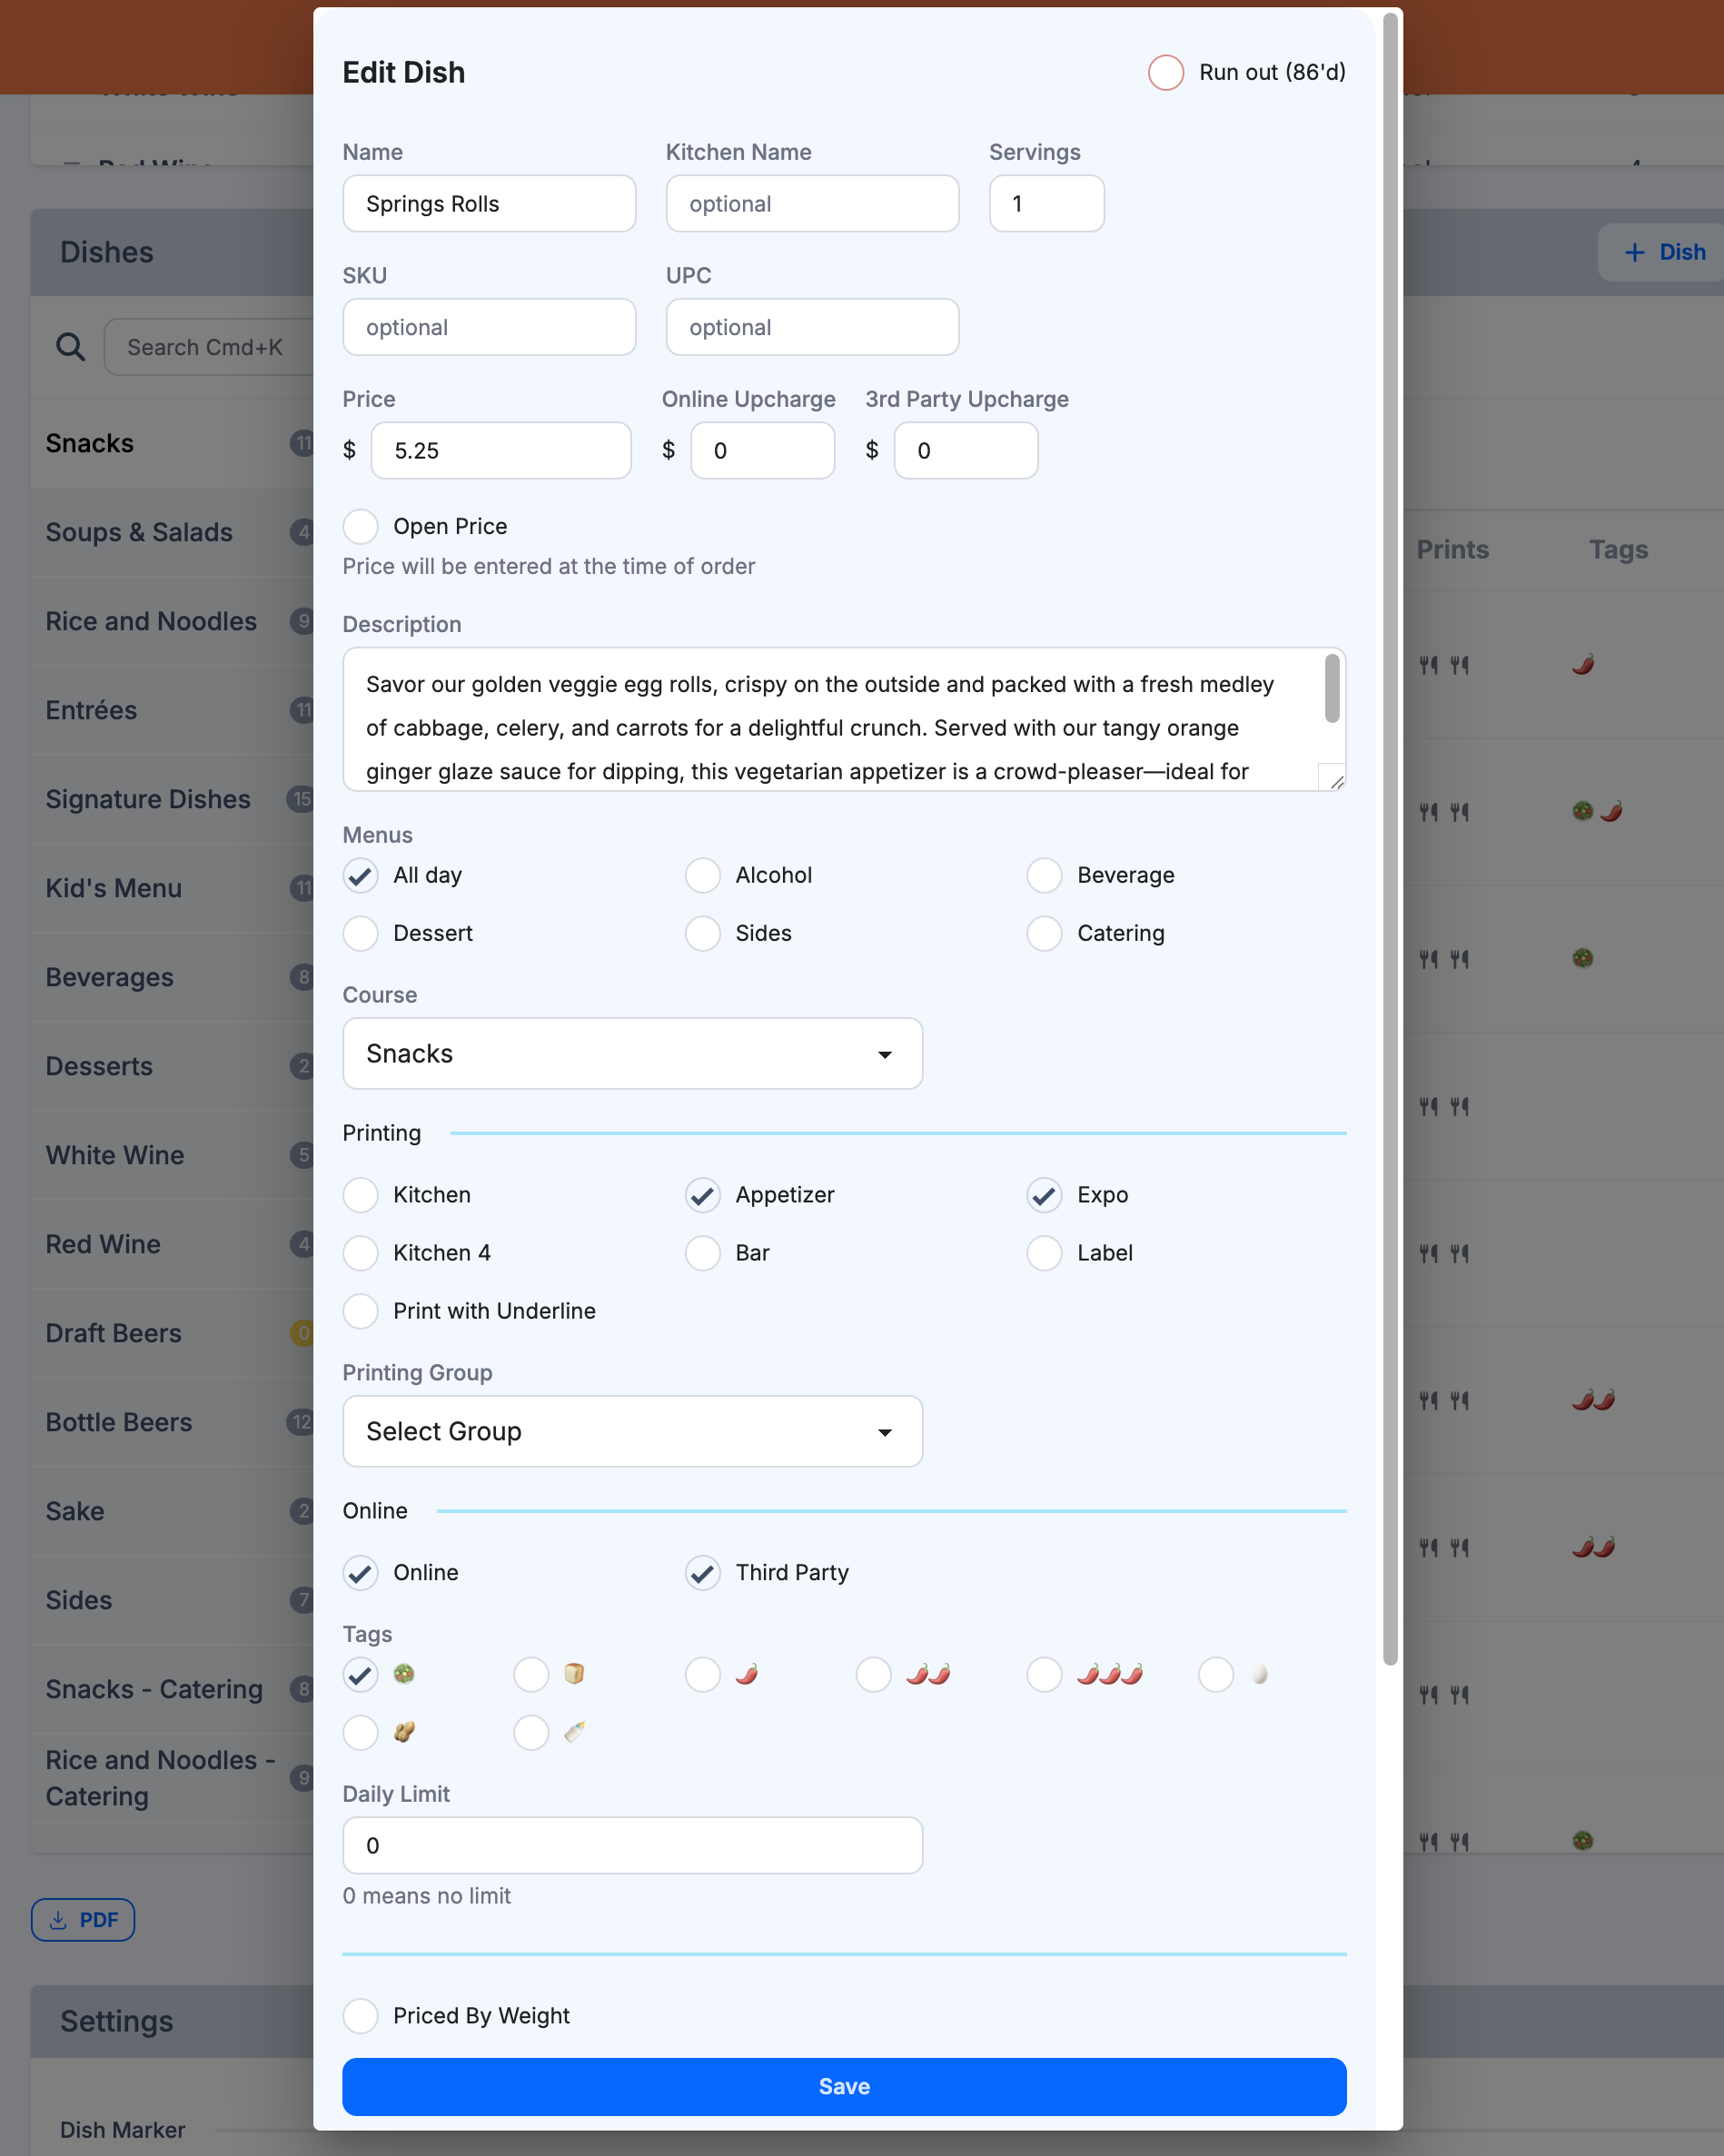
Add each food or drink that customers can order. For example, add Spring rolls to the Appetizers course and the Lunch and Dinner menus.
- Scroll to
Dishes. Click+to add a dish, or click an existing dish to change it. - Enter the customer-facing
NameandPrice. Add aDescriptionif customers need more detail. UseKitchen Namefor a shorter name on kitchen tickets. - Choose at least one
Menuand oneCourse. If you leaveMenusempty, the dish will not appear on any menu. - Choose the kitchen or bar printers that should receive the dish. Select a
Printing Groupif your kitchen uses one. - Turn on
OnlineorThird Partywhere customers can order it. UseRun out (86'd)when the dish is temporarily unavailable. - Set a
Daily Limitif you can sell only a certain number each day. Leave it at0for no limit. - Click
Save.
If online or third-party prices differ from the in-store price, set Online Upcharge or 3rd Party Upcharge. A pricing strategy for that channel takes precedence over the dish’s upcharge. You can also add a dish photo and modifiers, such as sizes or toppings.
Track a dish’s stock
Use Stock to record the amount you have, deliveries, counts, waste, and corrections. Sales do not reduce Current Amount yet.
Copy a dish
Use Duplicate when a new dish is similar to one you already sell. Check the copied settings before saving.
- In
Dishes, find the dish in its course or use the search box. - Click its
Duplicateicon in theActionscolumn. - Enter a new
Name. Check the copied price, menus, course, and printers. Add aKitchen Nameif needed. - Click
Save.
Set up printing groups
Create a printing group when you want to assign dishes to a named printer station.
- Scroll to
Settingsat the bottom ofMenu > Menus. - Under
Printing Groups, click+ Group. - Enter a name and choose a printer from
Select Printer. - Click
Save. - Return to
Dishes, open a dish, choose itsPrinting Group, and clickSave.
Add dish markers
Dish markers give staff selectable notes in the POS. You can put them above or below the modifier choices.
- Scroll to
Settingsand findDish Marker. - Turn on
Use Marker. ChooseTop of modifiersorBottom of modifiers. - Click
+ Markerand enter its name. Add aKitchen Nameif staff need a shorter kitchen label. - Click
Save.
Publish saved menu changes
Save your edits, then publish them so your POS and connected marketplaces receive the menu.
- Click
Publish menuat the top of the Menu area. - Review each connected channel.
Behindneeds an update;Not yet publishedhas no confirmed current publish status. - Select the channels to update, such as
POSorMarketplaces, then click the publish button. - Check each result. If a channel fails, click its
Retrybutton in the dialog.
POS includes POS screens and displays. When StreamOrder is connected, the dialog uses it for marketplace publishing instead of Chowly.
POS publishing is limited to once a minute. Wait for the displayed cooldown before retrying POS; other channels can still publish.
If no channels appear, no POS or marketplace is connected yet. If the publish status cannot load, click Retry beside the status message.
Check your menu before taking orders
If customers cannot see a dish on your regular online menu, check these settings:
- The menu, course, and dish all have
Onlineturned on and are not markedRun out (86'd). - The dish is assigned to that menu and course.
- The menu is not marked
Catering. Catering menus appear in the catering view instead. - The dish is not set to
Open PriceorPriced By Weight. Those dishes are not shown online. - If the dish is priced at $0, it needs a required modifier with at least one priced choice to appear online.
If a dish is missing from a third-party ordering service, check Third Party on its menu, course, and dish. Then follow the sync steps.
Related links
- Build your menu — import, edit, proofread, or build a menu step by step.
- Combo — group dishes into a combo.
- Modifiers and Matrix Modifiers — offer choices with a dish.
- Dish Guides — give staff preparation instructions.
- Third-Party Ordering — control menus sent to ordering services.