Make Order
The Staff member must be clocked in (unless the employee is set to “Turn Off Clock in on the Back Office) and logged in to create an order. To log in tap on the Login button lower left of the Make Order screen.
Trash Can: Delete the working order
Order type: Dine In, Pick Up, Delivery, Drive Thru
Member: Load customer information via phone number
Account: Enter customer name
Phone: Enter customer phone number
Tag: Enter order tag number
Scanner: Scan Item Bar Code
Search: Search Item by Name
Caller ID: Caller ID Service
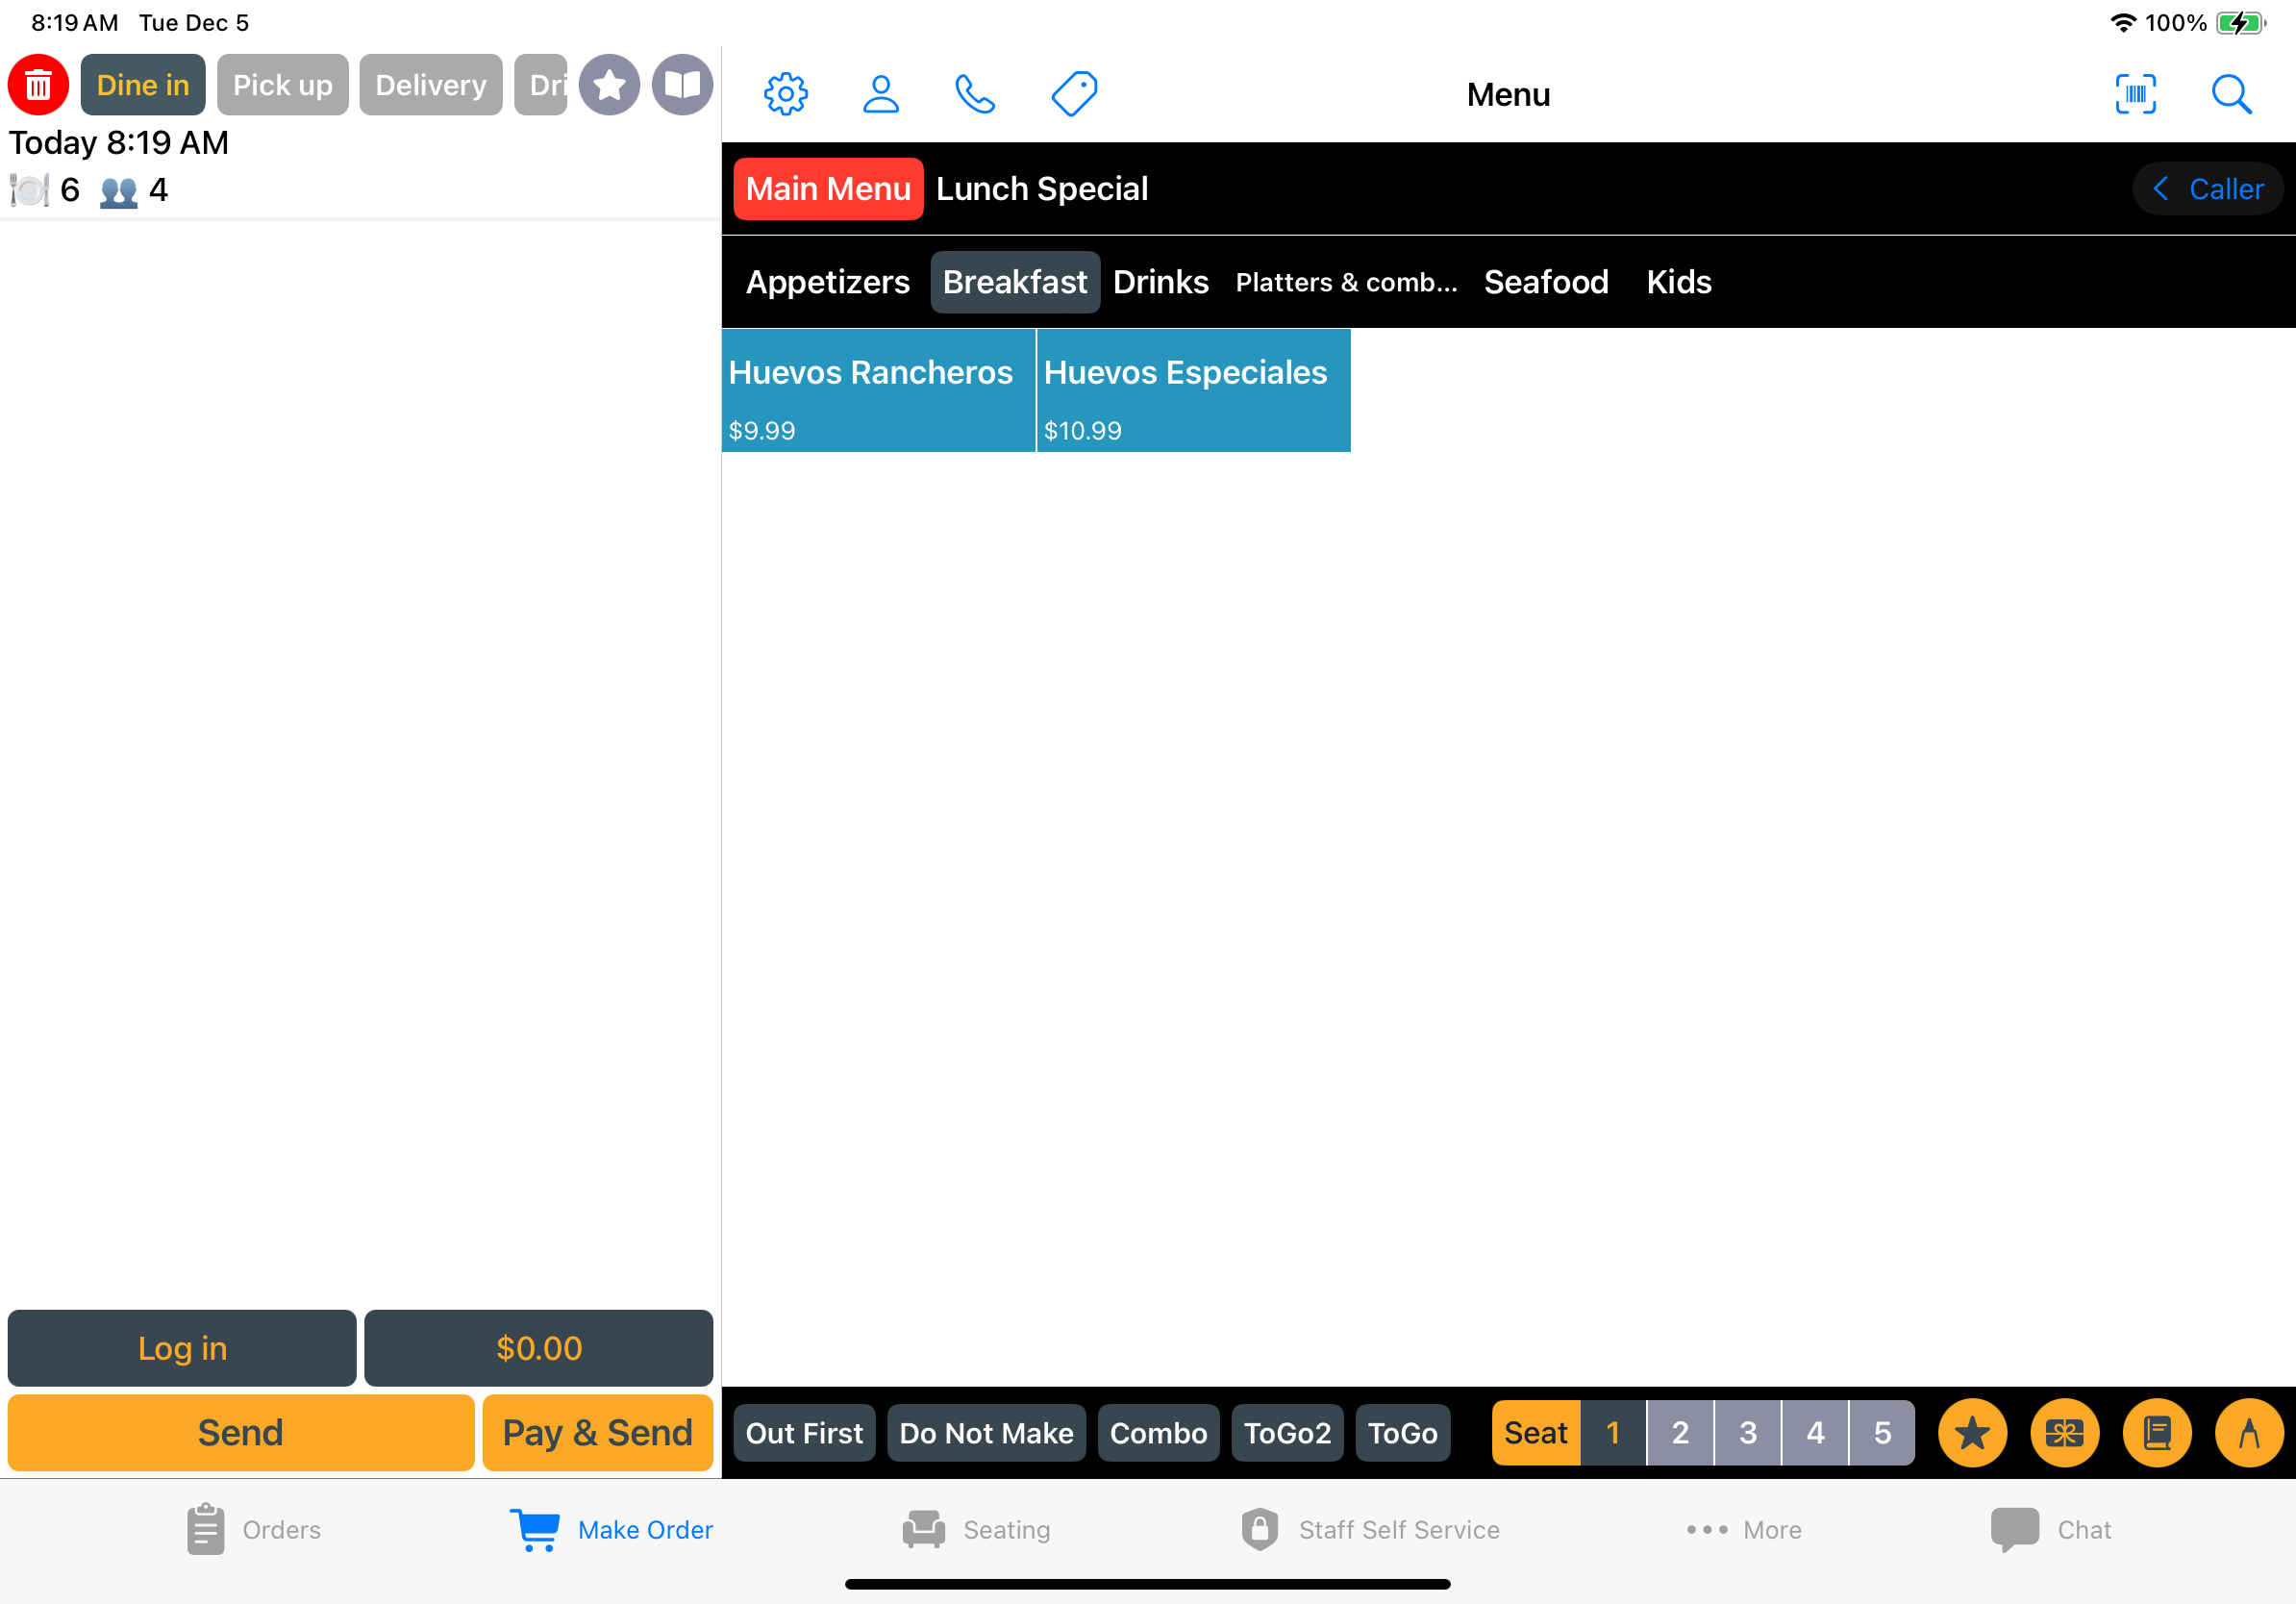
Menu Layout
Click the gear button in the top-left of the Menu view and choose among Block View, Block with Image, List View.
You can also choose to see all courses in one screen (Display by Menu) or separated (Display by Course).
Order Type
Order number is assigned starting at 1 each day. To select the order type, tap on the box corresponding to the applicable order type (located upper left of the screen).
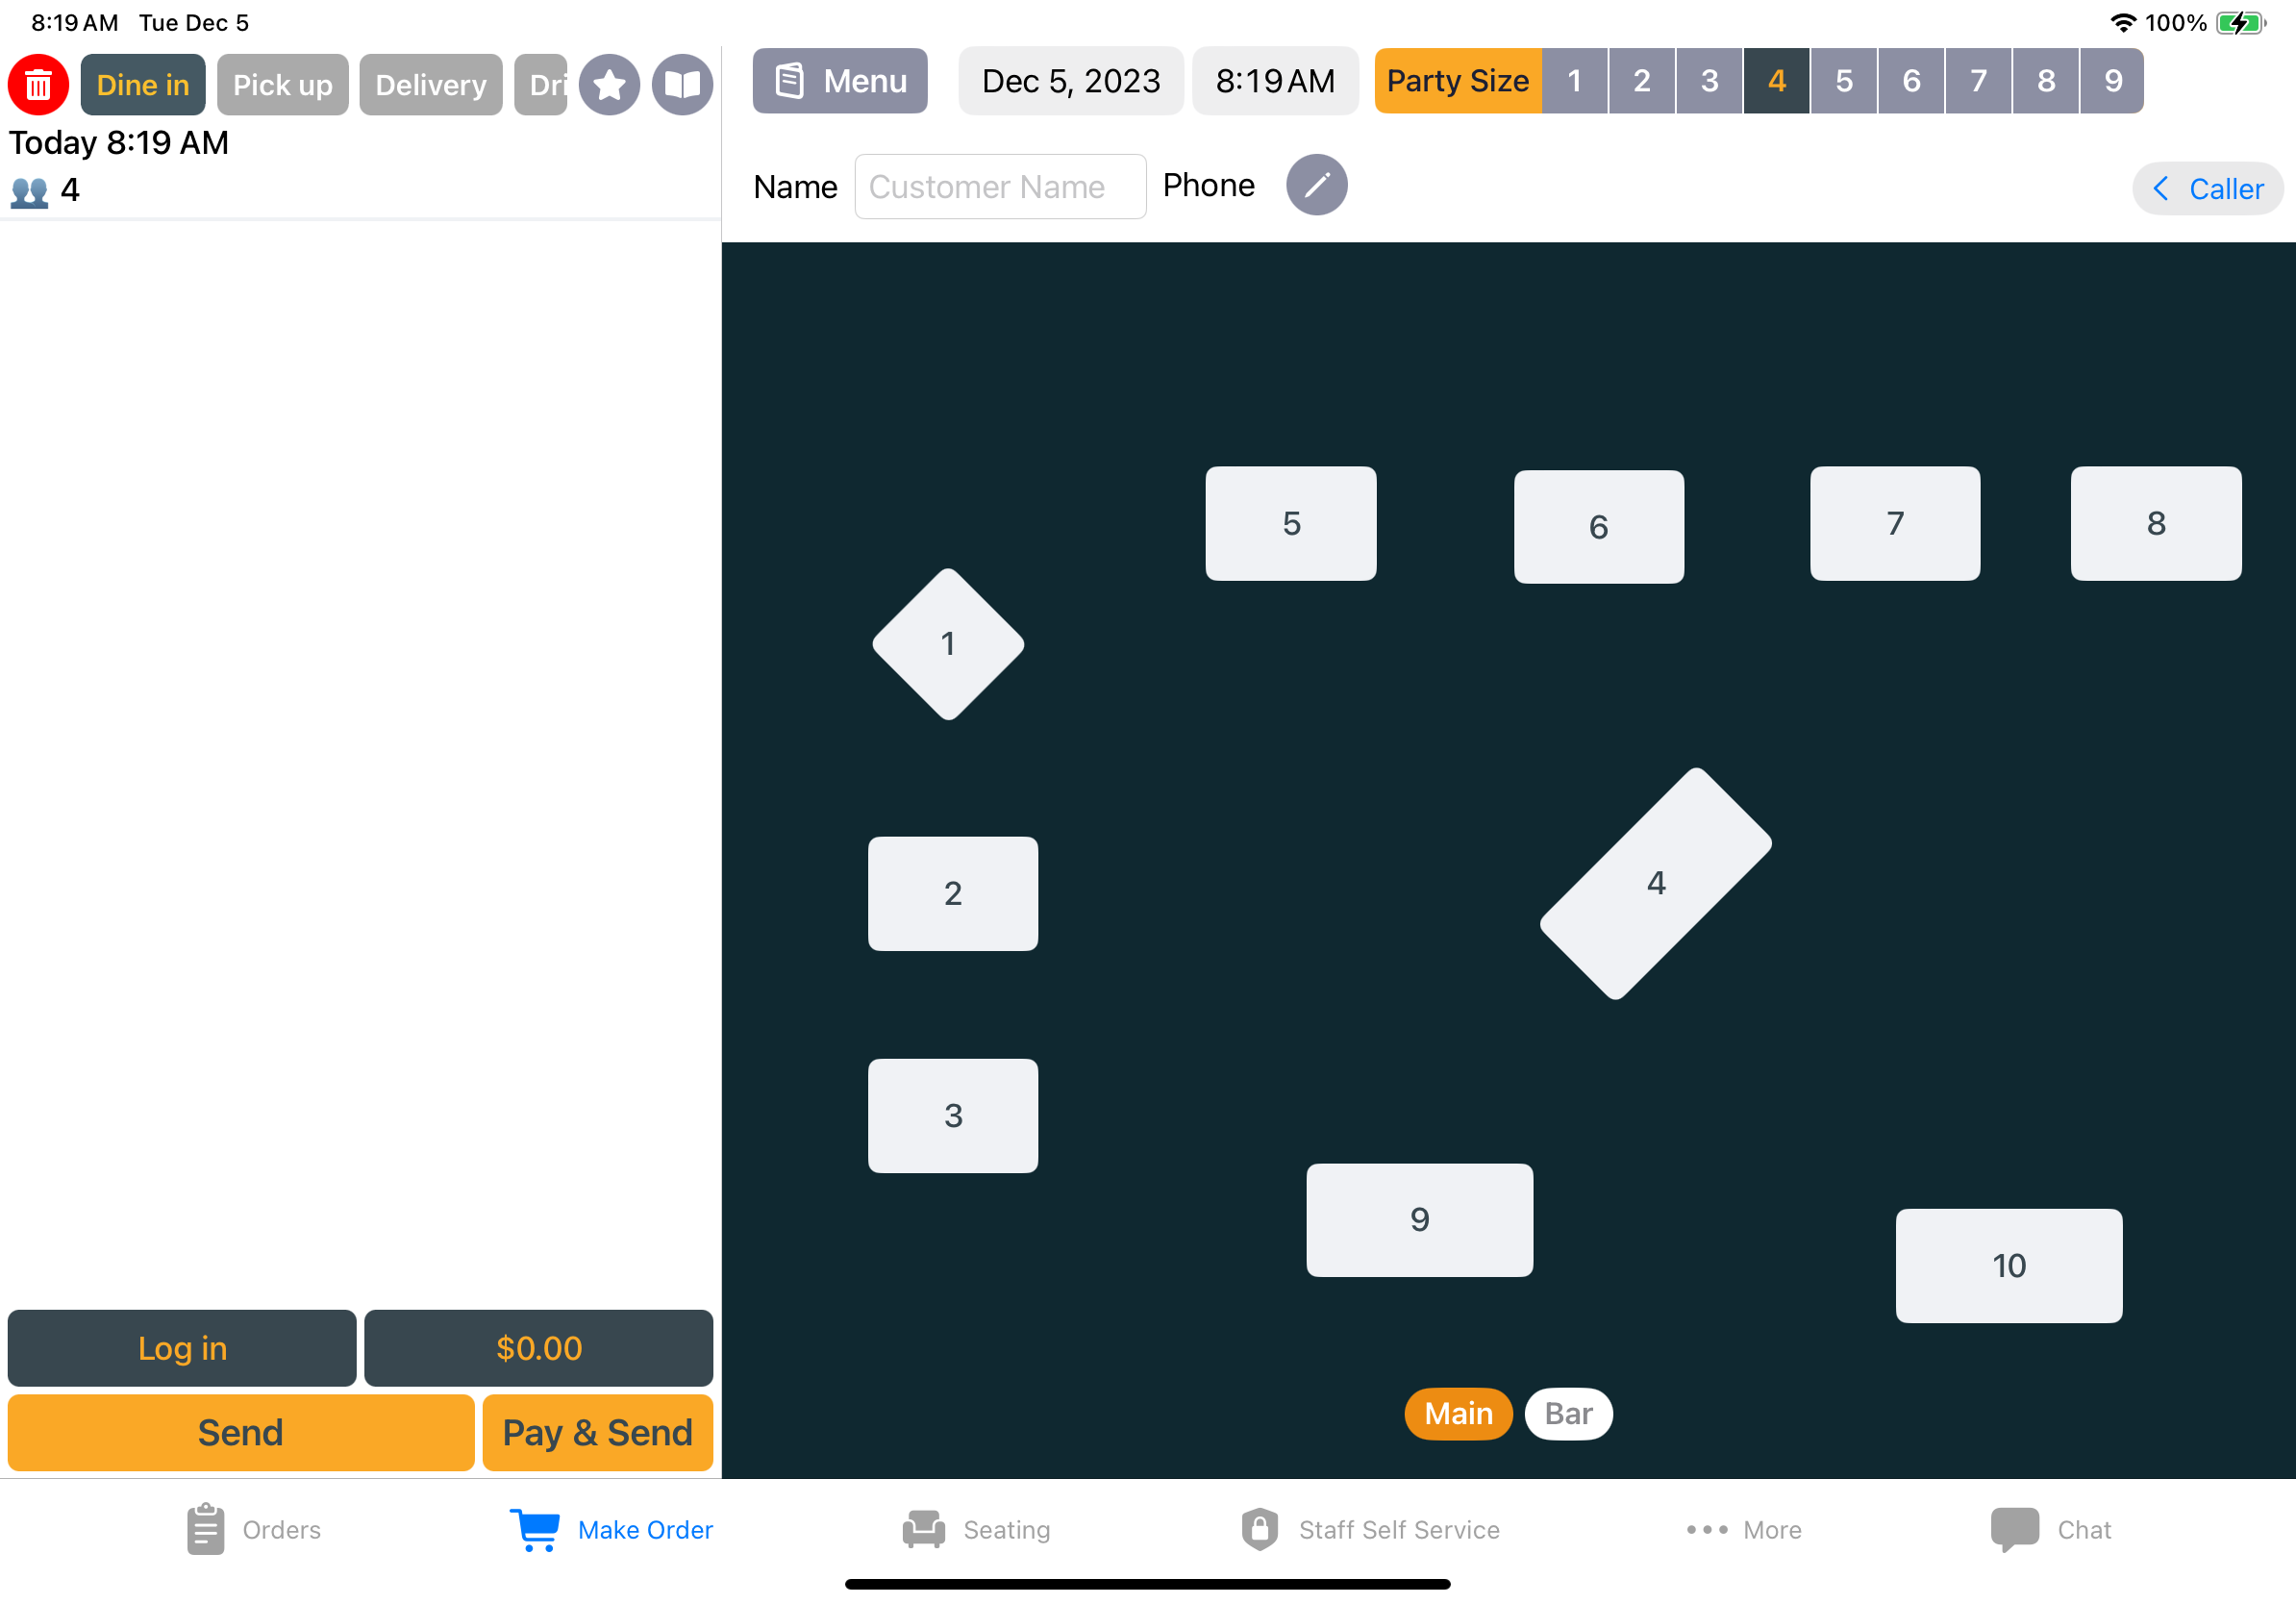
Dine In
Table Service
You need to first select the number of guests and a table. If you need to make a quick in-house sale, such as a sale at a bar, tap located upper left center of the screen to bypass the table selection.
Quick Service
This must be set up on the More/Settings. You need to first select a tag number (if mandated. see Back Office)
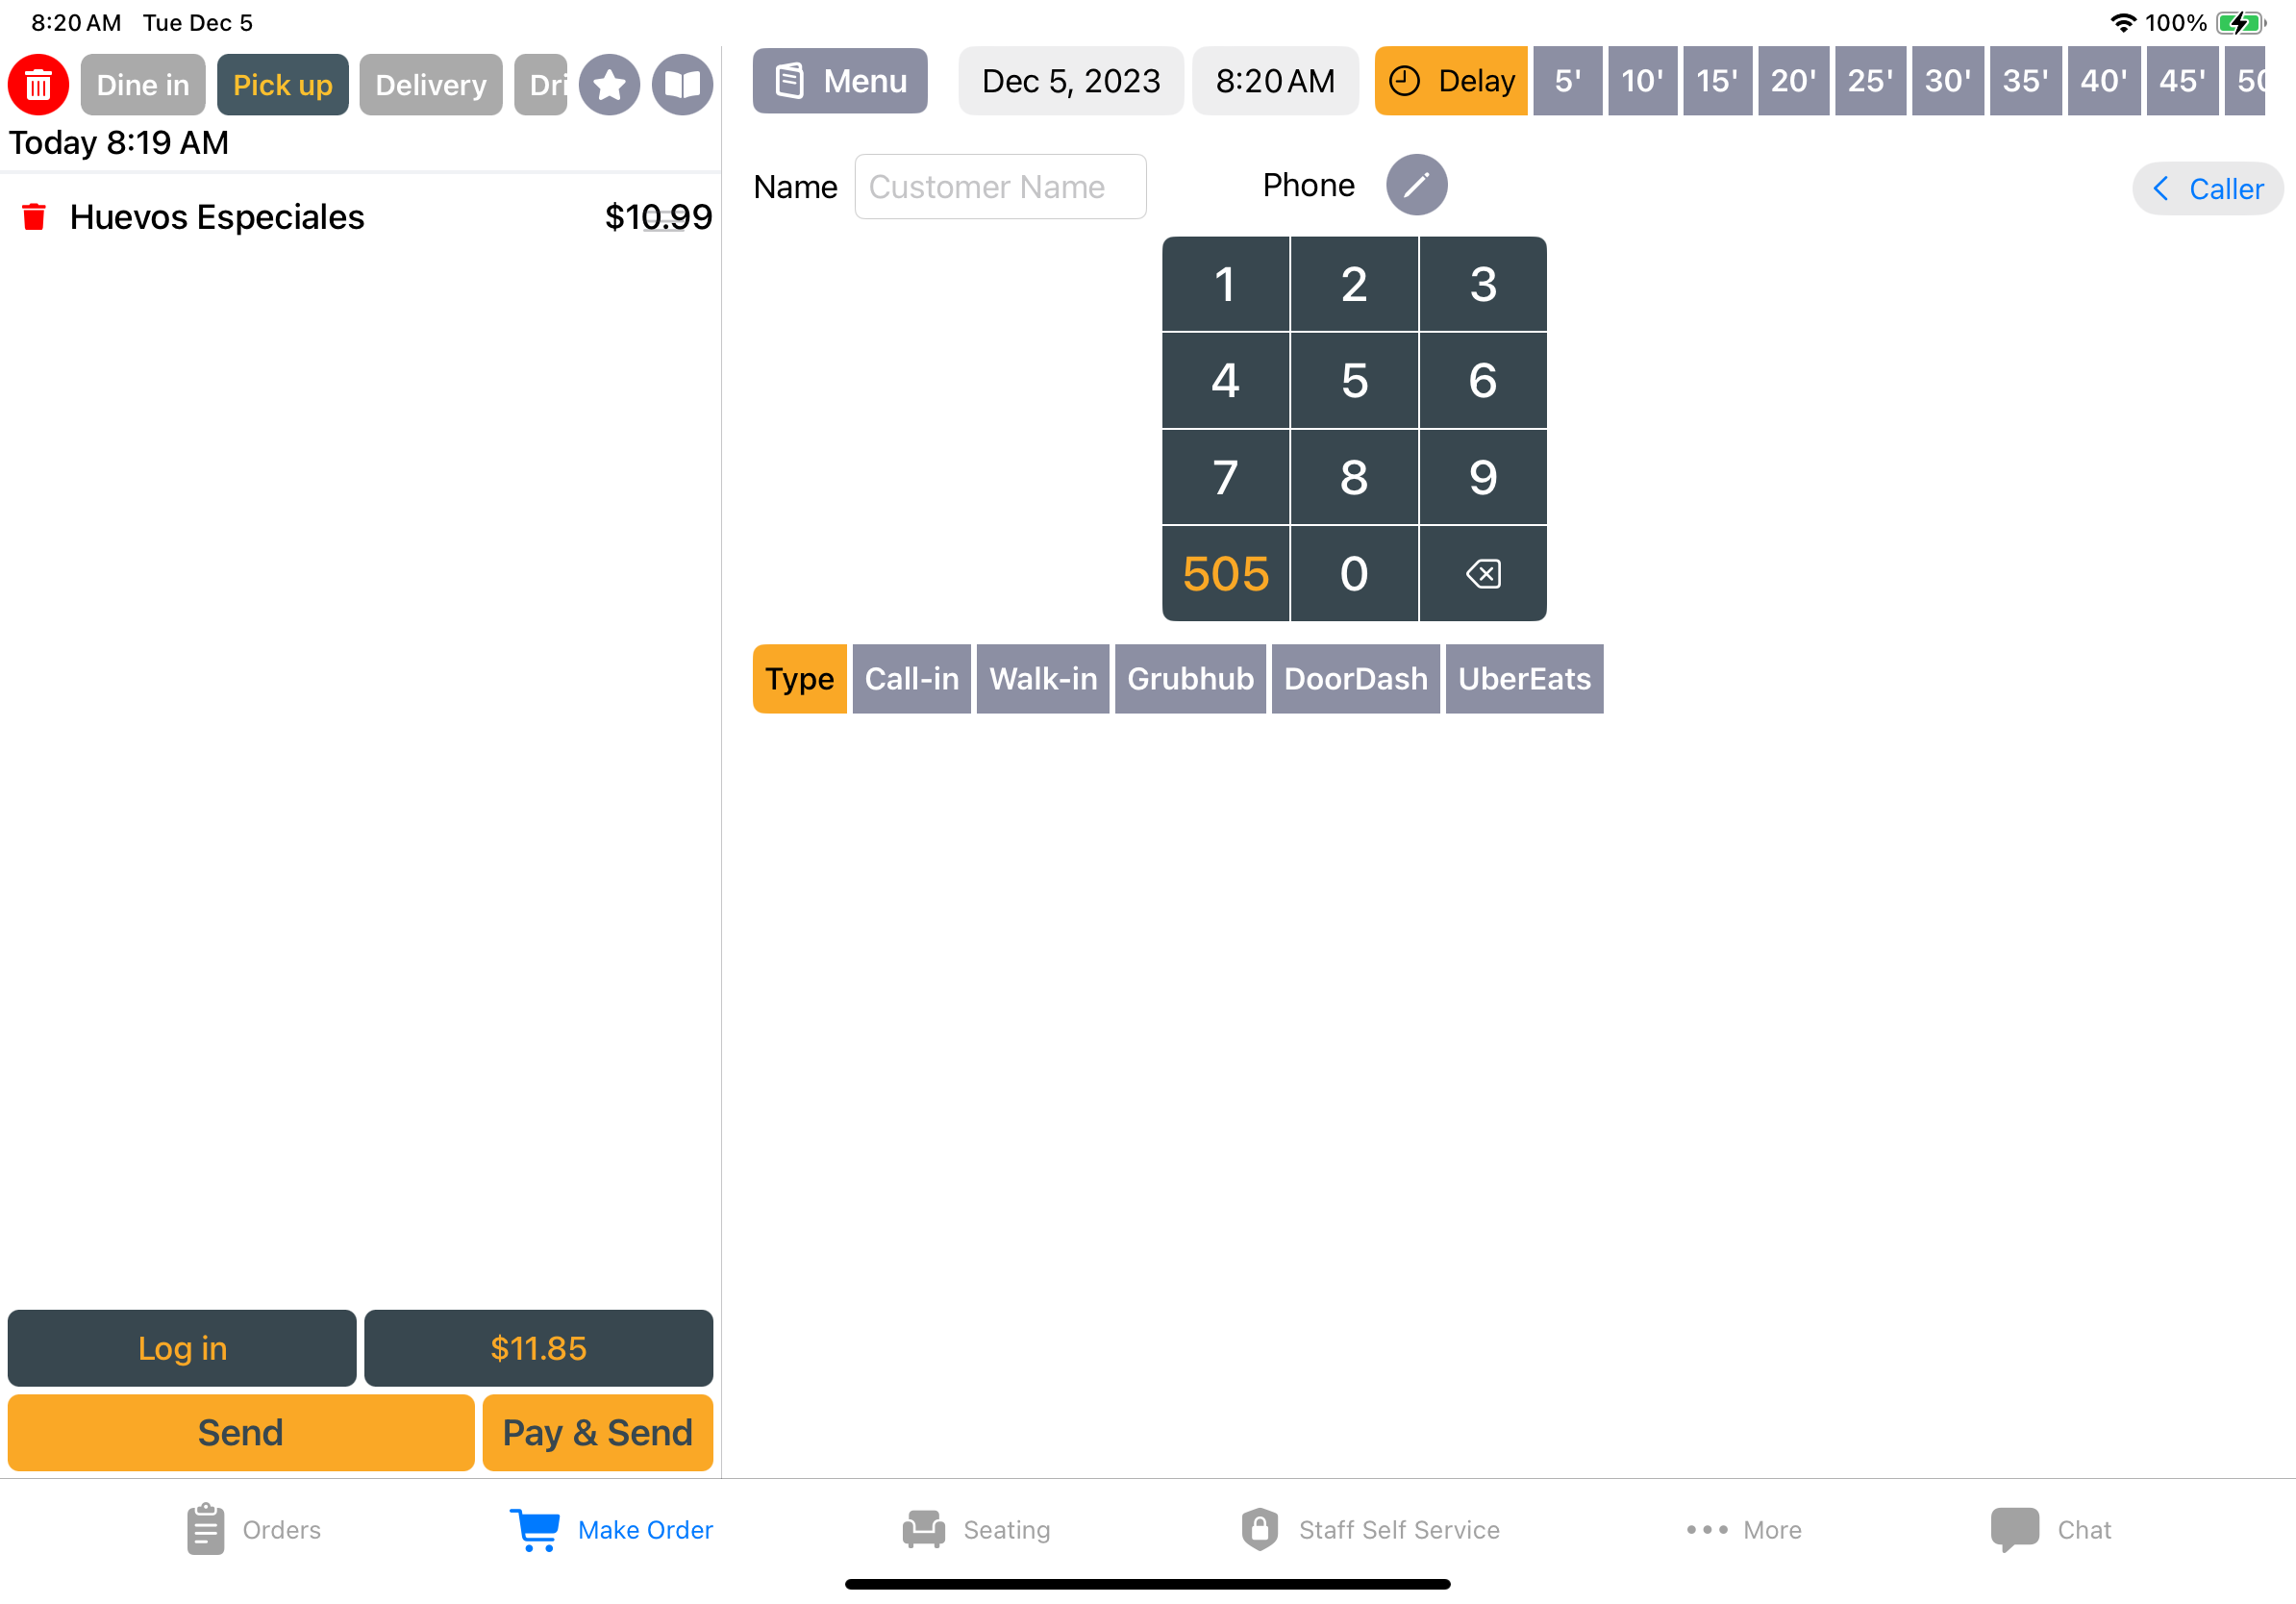
Pick Up
Any order to be picked up by the customer (not online).
- Chose the type of Pick up (Phone, Walk-in, or any other type of To Go entered in the Selflane Back Office Page 30).
- Type in the Customer’s name.
- Enter the customer’s phone number using the keypad.
- Choose the committed time frame (5’,10’ etc. minute’s)
- Tap Menu located upper left center of the screen. To input the order.
Delivery
If your business offers self-delivery
- Type in the Customer’s name.
- Enter the customer’s phone number using the keypad.
- Type in the Customers Address.
- Choose the committed time frame (5’,10’ etc. minute’s)
- Tap
Menulocated upper left center of the screen. To input the order.
Drive-Thru
To use this order type drive-thru must be set to on in More/Settings. If it to be other than Drive-Thru the type must be chosen.
Online
Selflane online ordering. Customers log onto selflane.com or clicks on your link on any platform it appears on. The customer creates their own order, pays for it online. The customer’s order will print a customer receipt and a kitchen copy (customer and kitchen copy will print at the respective printers).
Online orders are displayed in the “Order screen” color coded.
- Blue: New order not processed
- Yellow: Processing
- Green: Ready
- No Color: Done and Gone.
Third Party
Other companies your customers can order through. Doordash, Grubhub, Uber Eats, and others.
The customer creates their own order on the third party’s website, pays for it online. In most cases the third-party orders will be displayed on a separate iPad or Tablet. The orders will have to be manually entered into the POS system.
The business can purchase Selflane’s Third Party integration subscription. When the subscription is active the order will be automatically entered into the Selflane POS system and automatically printed to the printer(s). See SelfLane pricing for details.
See Chowly Integration for details.
Enter the Order
The Make Order screen is formatted by menu (top line of the make order screen), Course (2nd line), Dish which are displayed under each course. To select the dish, tap on the dish box. You can assign each dish to a seat number by tapping the seat number on the bar at the lower center of the make order screen or lower left of the modifier screen.
- If modifications are needed a modifier screen will pop up on the right. There are two types of modifiers, required (the circle above the modifier will be solid) and optional (the circle above the modifier will be open). Tap the modifier choice (if the choice is highlighted it is the default choice, it can be changed by tapping an alternative. If a dish and modifiers are identical you can tap on (located center top of the modifier screen) to change the identical dish quantity.
- There is also an optional modifier type “Matrix Modifier” The Matrix Modifiers will appear with the other modifiers of the dishes (if programed see Back Office), these will allow you to modify ANY dish with NO, Lite, Add, Extra, On Side, or other instructions. To choose the choice of the Matrix modifier Click upper right of the screen.
- You can assign each dish to a seat number by tapping the seat number on the bar at the top of the modifier screen.
- When you have completed the dish tap on the order summary screen, At the bottom of the make order screen on the right of the order summary screen there are multiple icons:
- Dish Markers – Notes to the Kitchen such as To-Go, Do Not Make or any common issue that may come up at your business. (Programmed in Selflane Back Office Page 24)
- Seat Number choice to assign a dish to a specific seat.
- Member (loyalty program if your business is signed up) to add Point Item. May need Manager Approval.
- To issue Gift Certificate or Gift Card (if the business is signed up for the Gift Card program) May need Manager Approval.
- A voucher or Coupon can be added either in the process of creating an order or adding items to an existing order (May need Manager Approval).
- Preset vouchers appear at the top of the screen. (You can add or edit fixed and named discounts in Selflane Back Office Page 27) tap on the appropriate voucher.
- Custom Voucher – If a fixed amount comp needs to be added on the fly, you can do it with the Custom button.
- Scan Rewards – used with the Member program.
- This is for miscellaneous entries. The entries entered with this will print to the printer(s) you select.
- Type in the information, type in the pricing amount.
- Enter the seat number if needed.
- Tap the kitchen printer you wish it to be printed on. All kitchen printers are allowed.
- Upon Completion of the order tap
- For quick serve orders tap (To set up to accept payment before sending the ticket to the kitchen printer is in the Selflane Back Office ‘Settings-> Printing”).
Examples