Users & Access
Control who can sign into your business and what each person can see. Give each manager their own login, and remove it when they leave. Only owners can open this page.
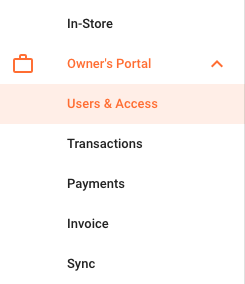
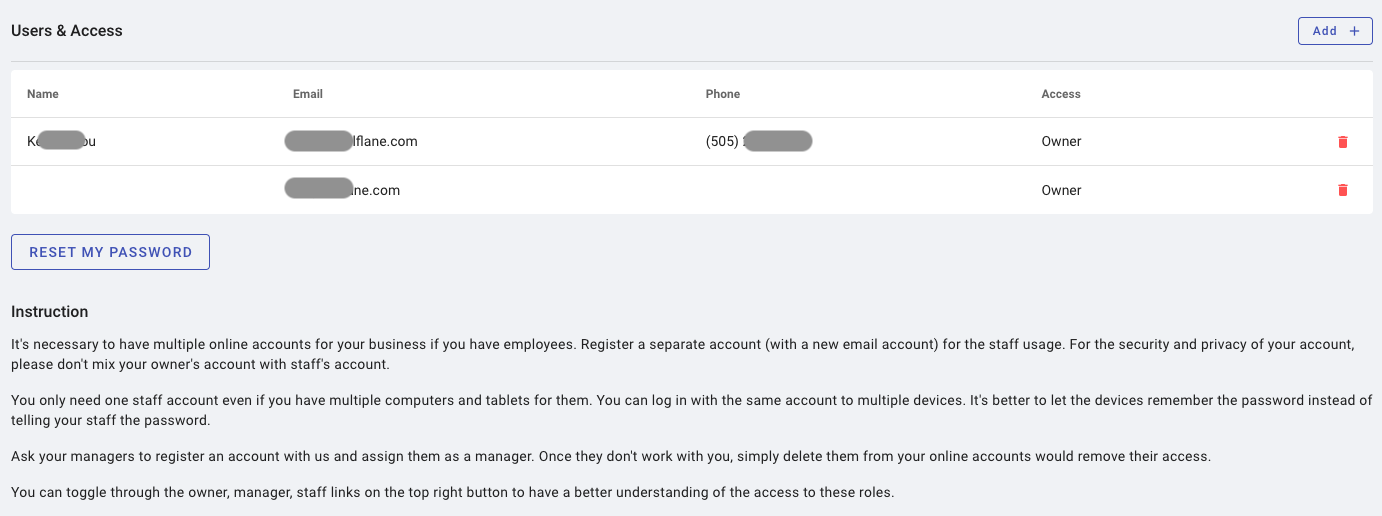
Open Owner's Portal > Users & Access in the Back Office . From top to bottom, the page shows:
Access requests: people asking to join your business.- One card per access level, listing everyone who has that level.
- An
Accessbutton to add a user. Pending Invitations: people you invited who haven’t accepted yet. The card is hidden when there are none.- An
Instructionsection with tips on setting up accounts.
You can add anyone by email, even someone who doesn’t have a Selflane account yet. See Add a user.
Access levels
| Level | Back Office | POS |
|---|---|---|
Owner | Every page, including all Owner's Portal pages and wage information. | Can sign in. |
Manager | Every page except the owner-only pages listed below. | Can sign in. |
POS | None. | Can sign in. |
Custom | Only the pages you check for that user. | Only if POS app access is checked. |
Owner-only pages that a manager can’t open:
Member SettingsInvoicing,Estimates,Clients,Products, andSettingsunder InvoicingEnterpriseUsers & AccessPaymentsandPAX TransactionsPlan & BillingData & History
For Enterprise organizations that manage several businesses, see Enterprise Access. The Enterprise level has only two roles, Owner and Manager. Regions group locations but don’t limit what a user can see; see the Enterprise overview.
View users
Each access level that has users gets its own card, in the order Owner, Manager, POS, and Custom. Users are sorted by email domain, then by email. Each user tile shows their name, email, and phone. Your own tile has a green border.
Add a user
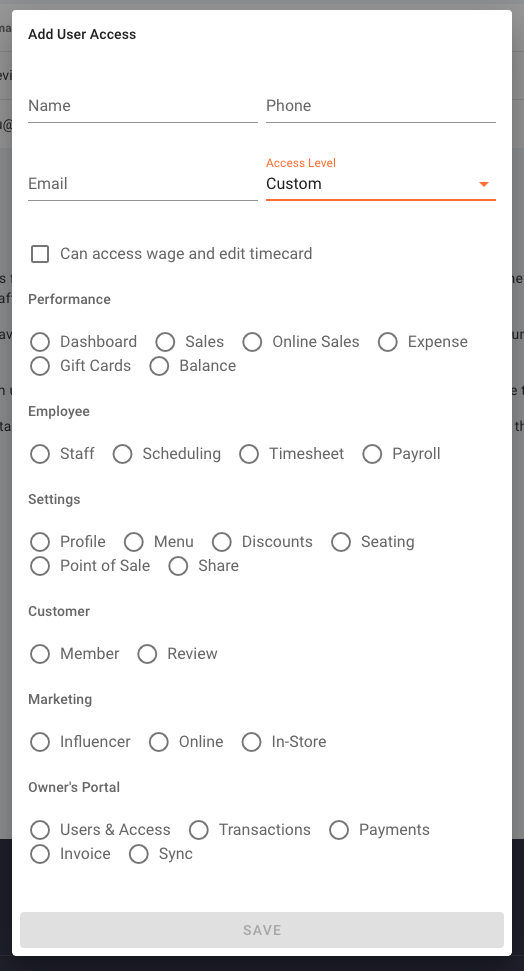
- Click
Access. - In
Add User Access, fill in the fields below. - Click
Save.
Email: the person’s email. Required. Selflane rejects emails already on this business and some blocked email domains.Access: the access level. Defaults toOwner, so change it before you save.Name: the name shown on the user’s tile. Required.Can access wage and edit timecards: appears forManagerandCustom, and starts checked. Uncheck it if the user shouldn’t see wages. Owners always have wage access.POSusers don’t see this option and are saved without wage access.POS app access: appears forCustomonly. Check it to let the user sign into the POS.- Permission checklist: appears for
Customonly. Check each page the user can open. You must check at least one.
The checklist groups pages the same way as the Back Office menu: Performance, Employee, Settings, Customers, and Owner's Portal. Custom users can never get Invoicing, Users & Access, Member Settings, or Data & History. A Custom user who was given one of these pages before can no longer open it. To let someone manage users or member settings, make them an Owner. Blocked Users, Influencer, and Enterprise aren’t in the checklist either.
You also can’t give a Custom user Payments, PAX Transactions, or Plan & Billing. A Custom user who already has one of these pages keeps it. When you edit that user, the page shows checked, and you can uncheck it to remove it. Once you save without it, you can’t add it back.
What happens next depends on the email:
- If it belongs to a Selflane account with a verified email, the user gets access right away. They get an email saying they’ve been added to your business, and you get a copy.
- Otherwise, Selflane emails them an invitation, and they appear under
Pending Invitations. They get access only after they accept it.
If the invitation email didn’t send, a message tells you to use Resend. If you invite an email that already has a pending invitation, Selflane replaces that invitation’s name, access level, and permissions instead of creating another, and sends it again. If it was sent too recently or too often, you see “Invitation updated. Email not re-sent yet, try again later.”
Manage pending invitations
Each row under Pending Invitations shows the email, a Pending or Expired badge, the access level, who sent it, and when it was last sent. If the last email didn’t send, the row says so. An invitation lasts 14 days from its last send.
Resend: emails the invitation again and gives it another 14 days. This also revives an expired invitation. You must wait 10 minutes between sends, and each invitation can be sent at most 5 times. Otherwise, you see “Try again in a few minutes.”Revoke: cancels the invitation after you confirm. The link in the email stops working.
Accept an invitation
The invitation email has a link to sign in to Selflane, or create an account, and accept.
- Open the link in the email, and sign in with the invited email. If you’re signed in with a different email, click
Sign out and continue. - If your email isn’t verified yet, click
Open my accountto verify it, then clickCheck again. - Check the business and access level, then click
Accept Invitation.
The Back Office then opens to that business. The owner who sent the invitation gets an email when you accept. If you already have access to the business, you keep your current access level.
Pending invitations also show under Invitations for you in the business picker, and on the page you see when you don’t have access to any business. Click View to open one.
Edit a user
- On the user’s tile, click the menu button (three dots) and choose
Edit. - Change the access level, name, phone, wage access, POS access, or permissions in
Edit User Access. - Click
Save.
If you change a user’s access level to POS, they lose wage access when you save.
You can’t change a user’s email. To use a different email, delete the user and add the new email. You also can’t change your own access level.
Delete a user
- On the user’s tile, click the menu button (three dots) and choose
Delete. - Check the email, name, and phone in
Delete User, then clickDelete.
The user loses access to your business right away. You can’t delete yourself, so your own tile has no Delete option.
Request access to an existing business
If you start creating a business and a duplicate-business notice shows the restaurant you need, choose Send access request instead of creating another business.
- Sign in with the Selflane account you want to use.
- Optionally, type a message in
Message to the owner (optional). It can be up to 500 characters. - Click
Send access request. Your account name, email, and message go to the business owners. If no owner can be reached, they go to Selflane support. - Open
My access requestsfrom the business picker to check the status. ClickCancel requestto withdraw a pending request. This option is also available before you have access to any business.
After approval, refresh the page so the business shows in your business picker. Sending a request does not grant access or activate online ordering.
Selflane limits how often you can ask:
- After a business declines you, you can’t ask that business again for 30 days.
- You can ask the same business at most 3 times in 30 days, and cancelled requests count.
- You can have at most 5 pending requests at a time.
Review access requests as an owner
The Access requests card lists each request with the requester’s name, email, message, and status: Pending, Approved, Declined, or Cancelled. Newest requests are first. Click Refresh to check for new requests.
Approve a request
- Click
Review requeston a pending request. - Check the requester’s name, email, and message.
- Choose an
Access role:Owner,Manager,POS, orCustom. PickingOwnershows a reminder that owners see all settings and wage information. - For
ManagerorCustom, checkAccess to wage informationif they need it. - For
Custom, check at least one page underCustom permissions. - Check
I confirm granting the selected access to this account. - Click
Approve access.
Approval grants access to the requester’s signed-in account and emails them. Approval never turns on POS app access. To let a Custom user sign into the POS, edit their access after you approve.
Decline a request
- Click
Review request, thenDecline. - Click
Confirm decline. ClickBackto return without declining.
Declining grants no access. The requester gets an email with the decision and a link to support. They can’t ask your business again for 30 days.
If another owner decided the request, or the requester cancelled it, approving or declining shows an error and the list updates.
Tip: Separate Back Office and POS logins
Create separate accounts for Back Office work and for the iPad POS, even if the same person uses both. Mixing them means a logged-in iPad sees Back Office tools you didn’t intend to expose at the front of house.
One staff account is enough for all your shared computers and iPads. Let each device remember the password instead of telling staff what it is.
Owner-level access required.